The Basics of YOAST SEO Plugin for WordPress
Are you looking for a comprehensive SEO solution for your WordPress site? If so, then look no further than the YOAST SEO plugin. This powerful plugin is designed to provide website owners with an easy-to-use and effective way to optimize their site’s search engine optimization (SEO). In this blog post, we’ll discuss the basics of using YOAST SEO on your WordPress site.
If you are a website owner who wants to increase your visibility on the internet and generate more traffic, one of the best tools you can use is YOAST SEO. YOAST is a powerful plugin that helps you optimize your website for search engines, making it easier to find in search results. Whether you’re new to WordPress or have been using it for years, here’s how to use YOAST SEO Plugin for your WordPress website.
What is YOAST SEO?
YOAST SEO is a free plugin that helps users improve their website’s visibility in search engines like Google, Bing and Yahoo. It provides users with an easy-to-use interface that allows them to customize the settings according to their needs. The plugin also provides users with tools such as keyword analysis, linking structures, meta tags and more. Additionally, YOAST SEO makes it easy to keep track of your progress over time by providing detailed reports on how well your content is performing in the SERPs (search engine results pages).
How does YOAST Work?
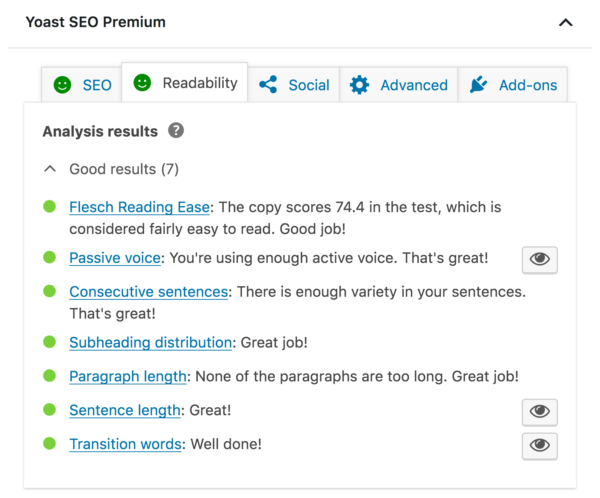
Using YOAST SEO requires a few simple steps. First, you need to install the plugin on your WordPress site. Once installed, you can access all of its features from within the WordPress dashboard. One of the most important features of YOAST is its ability to analyze content on your pages and posts and provide feedback based on how optimized it is for various keywords related to your topic. This feedback helps users identify areas where they can improve their content’s optimization and increase their chances of appearing higher in SERPs.
The next step is setting up all of your desired settings such as titles, descriptions, meta tags and more. Once these settings are in place, you can begin optimizing individual pieces of content using the keyword research tool that comes with the plugin. The keyword research tool will help you identify which keywords are most relevant to each piece of content and suggest different ways that you can incorporate those keywords into your text without sounding unnatural or forced.
Once all desired optimizations have been made, users can submit their page or post for indexing within Google’s database using the built-in XML sitemap generator feature within YOAST SEO. This ensures that Google knows about new or updated content right away so that it can begin ranking it accordingly in SERPs.
Installing YOAST SEO Plugin on Your Website
The first step is easy! All you need to do is open up the WordPress dashboard, navigate to Plugins > Add New and type “YOAST SEO” in the search bar. Once the plugin has been located, click “Install Now” and then “Activate”. Once this process is complete, you will see a new menu item on the left side of your dashboard called “SEO” where all of your settings will be located.
Setting Up Your Website With YOAST SEO
The next step is setting up your website with YOAST SEO. This includes adding basic information such as your business name, address, phone number and social media profiles. Additionally, you can set up title tags so that they are optimized for Google searches. You may also want to add meta descriptions so that when people search for certain terms related to your site they know exactly what they are getting into before clicking through. Finally, make sure that all pages and posts have an associated featured image so that it looks great when shared across social media platforms like Twitter and Facebook.
Optimizing Your Content With YOAST SEO
The third step involves optimizing all of your content with keywords that are relevant to your products or services. You should also include links back to other pages on your website as well as external sources if applicable. This helps readers find additional information about topics within their article which increases engagement with them over time and increases the chances of them becoming customers or clients in the future. Additionally, make sure that all images have alt text descriptions so that search engine bots can index them properly too!
Configuring Your Webmaster Tools
Once you have installed YOAST SEO, it is time to configure it for your website. The first step is to connect YOAST with Google Search Console (formerly known as Google Webmaster Tools). To do this, go back to your WordPress Dashboard and scroll over the new “SEO” tab that was created when you installed YOAST. Then select “General” from within that tab and then select “Webmaster Tools.” Enter in your webmaster tools verification code here and click save changes at the bottom of the page.
Setting Titles & Descriptions
Now that we have connected our site with Google Search Console, let’s set up titles & descriptions for our pages & posts! Titles & descriptions are important because they help search engines understand what kind of content they should be displaying in their results pages when someone searches something related to your website or post/page topic. Titles & descriptions also help readers decide if they want to visit or read more about what you are offering on a particular page or post. To set titles & descriptions, go back to the “SEO” tab in WordPress Dashboard and select “Titles & Metas”. Here you can set global settings for all pages & posts as well as individual settings for each page/post you create on your website from now on!
Using YOAST SEO is one of the best ways to ensure that your WordPress site is properly optimized for search engine visibility and success! By following these simple steps outlined above, website owners can quickly gain insights into how well their content is performing in SERPs while at the same time making sure they are giving themselves every advantage when trying to rank higher in search results pages online! With its powerful tools and easy-to-use interface, there’s no reason why any website owner should be without this essential plugin!
YOAST SEO is an invaluable tool for setting up a successful WordPress website! Installing YOAST SEO is easy—simply log into WordPress Dashboard>plugins>install new>type in ‘YOAST’ >activate it. Afterwards, configure by connecting with Google Search Console (formerly known as Google Webmaster Tools) and setting titles&descriptions so that search engines know what kind of content they should be displaying on their results pages when someone searches something related to your website or post/page topic! With these steps complete, everyone can get started utilizing YOAST SEO right away!
- Only Up Game: Soaring to New Heights in the World of Gaming - June 30, 2023
- Chicago: The Vibrant Metropolis of the Midwest - June 22, 2023
- Oceangate: Exploring the Depths with the Titan Expedition - June 22, 2023