Here’s how to create a WordPress sitemap. Creating a sitemap in WordPress is one of the most important steps to ensure that your website is properly indexed by search engines. A sitemap is a list of all the pages and posts on your website, which makes it easier for search engines to crawl your website and index all of your content.
Creating a sitemap in WordPress is actually quite simple. There are two main ways to do this – manually creating a sitemap or using a plugin. In this article, we’ll look at both methods and how to create a sitemap in WordPress.
Creating a Sitemap Manually
If you don’t want to use a plugin to create your sitemap, it is possible to manually create one. To do this, you’ll need to use an XML editor to create an XML file.
Start by creating a new XML file and adding the following code to the top:
<?xml version=”1.0“ encoding=”UTF–8“?>
<urlset xmlns=”http://www.sitemaps.org/schemas/sitemap/0.9“>
The code should be placed at the very top of the file, above any other code. This code tells the search engine crawlers that this is a sitemap file.
Next, you’ll need to add the URLs for each of the pages and posts on your website. To do this, you’ll need to know the URL for each of the pages and posts. Once you have the URLs, you can add them to the sitemap file like this:
<url> <loc>http://example.com/page–1/</loc> </url>
<url> <loc>http://example.com/post–2/</loc> </url>
Be sure to replace “example.com” with your own domain name. You’ll need to add a <url> tag for each page and post on your website.
Once you’ve added all of the URLs to the sitemap file, you can save it as “sitemap.xml”. Then, upload the file to the root directory of your website (e.g. example.com/sitemap.xml).
Using a Plugin to Create a Sitemap
If you don’t want to manually create a sitemap, you can use a plugin to do it for you. There are several sitemap plugins available for WordPress, but the most popular one is the Google XML Sitemaps plugin.
To install the plugin, go to the Plugins > Add New page in your WordPress dashboard. Then, search for “Google XML Sitemaps” and click the “Install Now” button. Once the plugin is installed, click the “Activate” button.
After activating the plugin, you’ll need to configure the settings. To do this, go to Settings > XML–Sitemap in your WordPress dashboard. Here, you can choose which post types you want to include in the sitemap and set the frequency of the updates.
Once you’ve configured the settings, click the “Save Changes” button. The plugin will then generate a sitemap for your website and update it automatically on a regular basis.
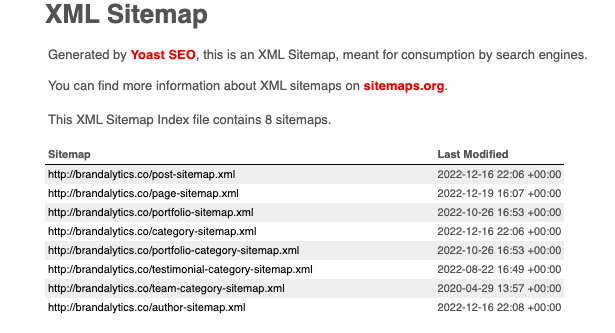
This is an example of WordPress sitemap generated by the YOAST SEO plugin.
Conclusion
Creating a sitemap in WordPress is a great way to ensure that your website is properly indexed by search engines. There are two main ways to create a sitemap – manually creating an XML file or using a plugin. Both methods are relatively easy and can help to improve your website’s visibility in search engines.
- Only Up Game: Soaring to New Heights in the World of Gaming - June 30, 2023
- Chicago: The Vibrant Metropolis of the Midwest - June 22, 2023
- Oceangate: Exploring the Depths with the Titan Expedition - June 22, 2023

Google Adwords Editor Is The Best Way To Make Campaign Edits